Azalea belongs to the Vereskov family, is a prominent representative of the genus Rhododendrons. The room representative is endowed with a huge number of bright inflorescences. The view is undemanding to the conditions of maintenance and care. Their apparent non-compliance can lead not only to falling leaves and inflorescences, but also to the death of the plant.
When to transplant azalea at home
Azalea transplantation at a young age is carried out 1 time per year. Any deviations from this norm can lead to stress and illness. The best period when you can transplant azaleas without harm to the flower is considered spring. At the same time, a bush is formed.

Plant transplant
Experienced growers recommend combining these two procedures. More frequent transplants are carried out only as a last resort:
- when the root system has outgrown the size of the pot;
- when the process of decay of the substrate or roots began.
After the purchase
After the acquisition, the plants ask themselves: how to plant azalea at home? Performing a transplant after purchase is a must. For transportation and sale, suppliers place the plants in a special substrate in which the plant is not comfortable growing for a long time.
On a note! Transplanting azaleas at home is possible only after the adaptation period.
Florists are advised to purchase ready-made soil specifically designed for azaleas. The flower is extremely demanding on the composition of the soil and the slightest disturbance in the proportions can lead at least to the development of diseases. At home, it is difficult to prepare the correct substrate.

Transplant after purchase
The transplant is carried out by the transshipment method. Azalea is thoroughly cleaned of soil mixture and planted in a well-drained container. Watering after transplantation is carried out directly under the root.
After flowering
Azalea transplantation after flowering includes the following activities:
- First, cut the buds.
- A special preparation is added to the acquired soil that protects the plant from fungal spores - trichodermin.
- A 1/3 azalea pot is filled with any drainage material to avoid decay of the root system.
- To increase the acidity level of the soil, a layer of pine bark is laid out on the drainage.

After flowering
How to transplant azalea at home so as not to damage the root system? The procedure is performed as carefully as possible:
- The plant is taken out of the pot. At this stage, it is important not to damage the roots.
- The flower, together with a dense earthen lump, is soaked in any stimulating solution for 30-40 minutes.
- At this stage, the root processes are carefully examined. If there are diseases or injuries, they are cut off with a sharp knife.
- After processing, move to a new pot and cover with azalea soil.
- The place for the flower should be as light as possible and be away from heating appliances. The adaptation time directly depends on the variety and the initial state of the bush.
Attention! A diseased root system will not allow the azalea to develop normally.
Reasons for a Transplant
There are several reasons why this procedure is carried out:
- If on the earth there are visible signs of the disease - mold, fungus.
- If part of the root or the entire root system is damaged.
- For a young bush - annually. For an adult - not more than 1 time in 2-3 years.
- With a strong growth of the root system.
How to transplant azalea in a room
Before you plant the azalea, carry out preparatory work. To do this, you will need:
- A sharp knife or pruner.
- Alcohol for processing tools.
- Purchased or self-made soil.
- Capacity for landing.
Soil selection and preparation
If for some reason it is not possible to purchase a special substrate intended for azaleas, it is prepared independently. To do this, mix:
- finely chopped pine bark;
- pre-dried sphagnum;
- perlite or vermiculite;
- sifted river sand;
- coal;
- nutritious soil.
All components are thoroughly mixed. Before planting, the resulting substrate is treated with a disinfectant.
On a note! One of the preparations is added to the final mixture: rootin or trichodermin.
Pot selection
A wide capacity is suitable for landing. The size of the new pot is selected taking into account the size of the root system. For azaleas, a cache-pot is ideal.

Transplant container
Update root pruning
Sanitary pruning of the root system has a beneficial effect on the plant. The flower, along with an earthen lump, is taken out of the pot. Initially, inspect external damage and remove dead parts. Do not recommend hands to separate a dense earthen lump, this can lead to damage to weak roots. Before trimming, soak it in a mixture of warm water and Zircon. After that, they start updating cropping. The roots are cut on each side by 1-1.5 cm.
Azalea Division
The division of the bush is carried out not only for propagation of the species of your choice, but also due to the large size of the plant. To do this, carefully remove the flower from the pot, examine the root system and cut off the diseased or dried parts as necessary. An earthen lump is cut with a knife into several parts.
Important! At least one shoot remains on each dividend. Each new plant requires its own individual pot.
Planting in another pot
The landing procedure consists of a series of step-by-step measures:
- The bottom of the 3 cm container is covered with drainage.
- The next layer is chips or chopped moss.
- For the prevention of decay, sprinkle with any antifungal agent.
- There is very little soil composition, only to carefully distribute the root system over the landing tank.
- The roots of a pre-soaked azalea are slightly squeezed.
- The flower is placed exactly in the center of the pot and carefully covered with soil.
- It is not recommended to deepen the root neck of the plant, this can damage it and will not allow normal development.
- Tamp the substrate slightly.
- Watering after planting is performed with the same composition in which the soaking was carried out.

Overgrown Root System
Note! Azalea should not be abundantly watered after planting. This can lead to decay of the roots, and then the whole flower.
Features of azalea transplant in the garden
Transplanting or planting a street representative in the garden is carried out in early spring, until the moment of active sap flow. In extreme cases, the transplant of the species can be transferred to the beginning of autumn. Azalea street has a superficial location of the roots, which is why it does not need a deep hole for planting. Depth - no more than 50 cm, width - 70-80 cm. The bottom of the seat is covered with a thick layer of broken brick or gravel.

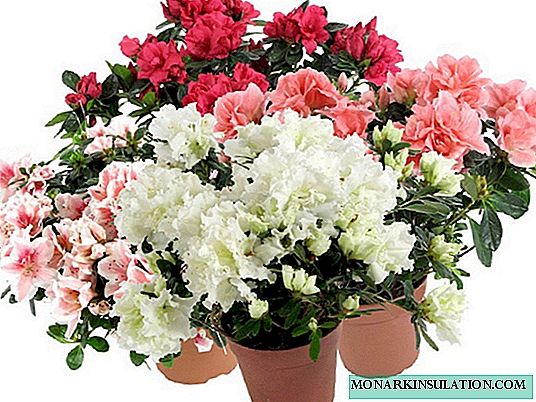
Garden varieties
On a note! When lime powder is added to the soil, the acidity index of the soil gradually changes. This is bad for azaleas.
The soil should consist of nutrient land, peat, humus and river sand. Landing a street representative is no different from indoor. The root neck of the transplanted plant should be located above ground level. After planting, the soil is tamped and moistened.
Common transplant errors
Failure to comply with the rules of transplantation can lead to infection of the plant with a fungus or the invasion of harmful insects. With excessive watering for azaleas, there is a risk of getting rust or root rot. In the fight against the disease, any fungicide or solution of copper sulfate perfectly helps.
When pests, aphids, spider mites or whiteflies appear on the plant, timely treatment with an insecticidal agent will help. If after an azalea transplant, home care does not allow you to get buds, then the reason is:
- unsuitable soil for cultivation;
- illiterate watering and spraying;
- dry air
- non-compliance with the norms of fertilizing.
Further flower care
During the period of active growth, the plant is promptly and abundantly watered. Humidification is carried out as the top layer of the earth dries. For watering, warm, settled water is suitable.

Healthy plant
Additional Information! Adding citric acid to the water for irrigation will help maintain the required level of soil acidity.
In dry times, the bush needs spraying, which is carried out in the early morning or after sunset. By the end of the season, watering is reduced by at least half. Due to lack of moisture, azalea stops growing and can survive wintertime without any problems. Dressing the flower is carried out three times a year:
- Nitrogen fertilizers are applied immediately after the flower "wakes up" in early spring.
- At the time of budding, potassium and phosphorus are added to the soil.
- After the buds bloom, the soil is fertilized with a mixture of phosphorus and potassium. The proportion of the composition is 1: 2.
Important! Do not allow fluid to enter the root neck. Watering the plants is carried out at a distance of at least 10-20 cm from the center of the azalea.

Azalea in the garden
Indoor and outdoor azaleas are a responsive culture. Compliance with the rules and regulations of agricultural technology will invariably lead to abundant flowering. The view can easily become a decoration not only of any home, but also of a personal plot.